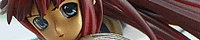
Here are some "work in progress" pictures of the Haruhi guitar I found while digging through the photos for the stockings. I would say that the guitar was the hardest part of this kit since it contains so many tiny pieces and could easily induce build paralysis at times - simply because you don't know where to start or what to do next.
Sometimes you just have to do something, even if you don't know how it will all fit together, so just focus on one part at a time.
I started with the main guitar body. I had an idea on how I wanted to paint it, so it was the easiest to start with. All the holes are plugged up with masking tape so that after painting, the resin can be easily exposed when it comes time to glue the parts together. When gluing, you want the glue to adhere to the resin surface, not to a painted one or else the bond is only as strong as the paint.
This is clearly a chore in masking technique, the white panel and the wood body are molded together, so you have to mask one and then the other. I chose to mask the panel first, paint the body, then mask the body and paint the panel. However, I masked the body too soon and the tape reacted with the paint layer - you can see the uneven surface at the top and where I started sanding it down at the bottom. It's not a big problem, as it will just get repainted after cleaning it up, but the lesson learned is to wait until the paint fully cures before masking.
This is the back of the guitar body with a wood grain applied (it is dry brushed on). Here's how I did it. A base color of tan is sprayed over the whole part (the same color as the inside of the sound hole). Using a wide (1/2") stiff bristle brush, dip it into dark brown and then dab it onto newspaper until no more color comes off (yep, it's a total waste of paint, but it must be done as this is the "dry" part to dry brushing).
Once the tip of the brush is dry, I lightly drag the brush over the light brown base in one direction. How much paint comes off depends on how much pressure is applied, so this is repeated until I have a suitable texture to work with. Now, wood isn't perfect, it's organic with knots, curves and discolorations. So with a smaller brush, I paint the dark brown on random areas using small circular strokes.
It's important to let the paint dry and cure. Acrylics take a long time to cure, but generally one day should be sufficient here, as I am just going to sand some of the surface texture down. With 600 grit sandpaper, the surface is very lightly dry sanded - I only want to knock down the dry brush texture, not touch the base coat. There are only two colors used in this grain, but it looks much richer because the sanding will create a gradient of colors in between. After sanding, the surface has a low-contrast, whitish look to it with the sanding residue. All the residue is wiped off with a dry cloth and then a clear coat of Future is applied making the grain pop out as in the picture above.
Finally, the edges are sprayed with black to get the burned look on the sides.
A dry brush grain is applied to the neck as well, but lighter browns are used to get a different wood for the back of the neck. This is done exactly the same as with the body.
The fretboard is masked and dry brushed as well, using darker browns. This gives a nice texture to the fretboard, even though you'll never see it unless you are examining it up close. The silver frets are painted last.
The Italia logo is done in photoshop and printed on white ceramic coated paper - I used this because I had it lying around and the ceramic white is smooth with no paper grain. You can buy decal paper, which probably works better, but I didn't. This is then cut to shape and sealed onto the headstock by coating it with Future.
The other parts are all painted (black and silver) and assembled. The tuning posts and tuners are pinned all the way through the headstock, which gives the posts some extra strength so they won't be as fragile (you will be dropping this guitar quite often while trying to position it in Haruhi's hands *grumble*). Brass strings are then wound around the tuning posts for some added realism (finished guitar in the Haruhi post).

Gallery Links


About This Blog
- peto
- Sunnyvale, California, United States
A blog of my hobbies and a place to show progress and finished models. Galleries are embedded as slideshows to reduce page load time, but you can open any album by clicking on its label.
 Subscribe in a reader
1 comment:
WOW dude i really LOVE that guitar. I was wondering if u would let me buy one of u and how much it would be?
Post a Comment