
[ 03.06.08 ]
I've started working on this BUBBA Yuki Nagato to complement the BUBBA Haruhi Bunny. This is going to be a real WIP, in that I am posting while it's still in progress and not as an afterthought. I'm going to keep this as a single post and edit it with updates as it progresses.
Flash removed and pinned. You can see red marks on the resin. I use a red Sharpie while removing the flash to mark areas that need more work so I don't forget later. All of the red marks need to be fixed and removed before painting.
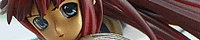
This is how my eyes start out. Eyes are painted white and the base colors for the iris applied. I do this first because at this point, it is easy to strip and redo if I don't like the results. Eyes may be the most important part of a kit, as I have seen perfectly painted kits with bad eyes and it ruins the whole thing. So I make sure they are right from the start. Once they are the way I want them, it's an easy matter to mask over them and finish the face.[ 03.09.08 ]
Here's my workspace tray (from Ikea), which has all the parts for the kit. It's easy to pick up and move around, and easy to hide away if I have company over. The rim makes it hard to lose any parts and spills wipe away easily. It fits my cutting boards too.
These parts have been painted with a base coat with some clean up being done. Some of the parts have been shaded, but the rest are just flat coats. There's some difficulty here in how to get rid of the seams, since the breakdown is a bit odd, the seams will have to be filled in after assembly and those areas carefully repainted. If you don't care about the seams, then you can paint the whole thing now and just assemble it, but I want the hair and the collar seamless, so it's going to be 2 steps for me.
The face is mostly complete, but will need a final matte finish on the skin tone.[ 03.12.08 ]

I did the shading of the uniform tonight. The blue is a custom mix of blue green, the base coat is more green and the highlights are more blue. The result looks much better than just having a solid color. What's left is the socks and shoes, assembly, fix the seams and repaint the seam areas. Then...
..another guitar. This one should be easier as it'll just be painted a gloss white and black, same colors as in the anime. There's just a lot of tiny pieces to it.[ 03.14.08 ]

It's White Day, so tonight I painted white (it's just a coincidence). This is the reason I disassembled and cleaned my airbrushes yesterday - white is kind of a tricky color to spray (at least for me). If there's any paint residue in the brush, it can easily ruin a perfect coat of white. I learned that the hard way, so now I make sure the brush is completely clean before spraying white or clear.[ 03.17.08 ]

Busy this weekend, so not much progress. I started building the tuner assemblies Sunday night and puttied the collar of the cloak. I did some shading tonight - added an off-white to the shoes and shaded the hands and legs. Cleaned up some issues with the guitar and gave it a second coat of white.[ 03.23.08 ]

I started assembling the main body and head. The hair is puttied, sanded and painted. The cloak is finally sanded and ready for painting (I forgot about it). If I had planned it right, I could have painted it with the guitar parts, which are all base coated black before a metallic is applied. I've decided to paint the tuners a gold/brass color to go with the white guitar. There's some progress on the socks and shoes, but I'm still deciding on how to shadow the shoes, maybe a light brown would work.[ 03.26.08 ]

Except for some clean up and detail work, all the parts are painted. What's left is to clear coat and apply the appropriate finish, then assemble the whole thing. You can see all the tiny guitar parts here with their metallics over gloss black. If you use thin layers, you can control how much black shows through and get some subtle shading through the metallic color. It looks so much better this way, otherwise spraying over the metallic will just dull it. I should be done this weekend, so this will probably be the last WIP in this series. Oh, the cat, I'm going to save for a later date.[ 03.29.08 ]
One more post to detail the guitar headstock build, which I didn't do for the Haruhi guitar wip. From left to right: tuner assemblies, guitar base, tuners pinned-thru, and finished headstock.
I build the tuner assemblies with extra long pins for painting, so there's enough space for the clamps to hold. At this point, the pins are only glued to the tuners, not the caps, which are held by friction. Once painted, the caps are twisted off and the pins cut to the proper size - they will go from the bottom of the headstock through the top with about 1mm of the pins above the surface. The caps are then glued onto the pins with CA glue and the headstock is ready to be strung when the glue cures.
Here's the completed guitar with a test fit on the figure. This kit didn't come with strings, so I used 6lb test line (fishing line) from the sporting goods department. The string is glued under the bridge, then pulled tight and tied on the tuning cap. Leave some excess, so you can pull the knot tight and a dab of CA glue holds it in place. Once it's fully cured, I'll trim the excess to about 3mm or so.
This is also the first picture of the unwrapped head and everything turned out nicely. Notice there's no visible seam on the top of the hair - all 3 hair pieces blend together smoothly. Well worth the extra time spent.
[ complete ]
Not being one to leave anything alone, I ended up adding some more detail to the guitar. Lining the base of the pick guard and painting the back plate black. You can see the finished results in the Yuki gallery. ( ... read more » )







 Subscribe in a reader